

12 Reasons Why You Should Use Google Forms WordPress
- Easy to create, add and use.
- The forms are adaptive, so you can create, edit or respond to forms from any size screen.
- Data can be saved directly in the spreadsheet.
- You can create a single form and share it on several websites.
- It’s easy to share online.
- All data is stored on Google Drive.
- Quick access to all your forms in one place.
- You can view the answers in real time and see how individual respondents answered specific questions.
- Answers can be organized and neatly displayed.
- Various add-ons, such as timers, for even more functionality.
- The ability to embed images and YouTube videos directly into form questions.
- Functions such as pre-populated replies, required fields and multiple choice grids.
WordPress forms are also great, but Google forms can be the best option when you want to display forms on multiple websites or platforms, collect answers in one place and share them with others.
Option 1: How to add Google Forms WordPress manually
To get started, visit the Google Forms web site and click Create Form . You will need to have an account with Google before you start working with forms.
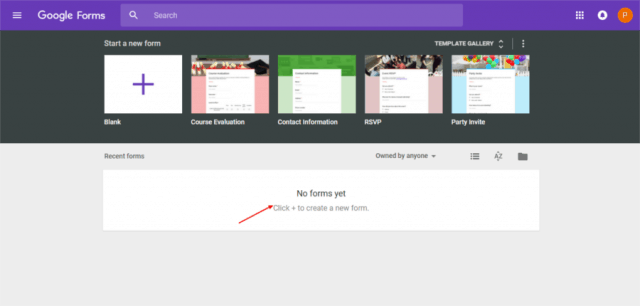
You have two options: create a new form from scratch or use one of the many available templates.
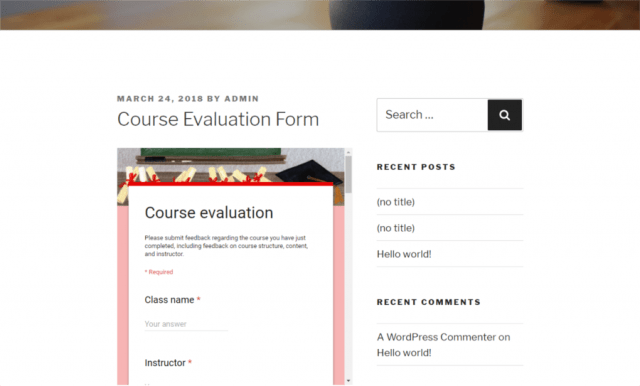
For the sake of clarity of this article, we will choose the form of the course evaluation, but you can choose whatever you want.
See Also:How to remove a virus from the WordPress site
The page has a floating menu that will help you change and customize the form. You can add more questions, enter a title / description, insert images or videos and create additional sections.
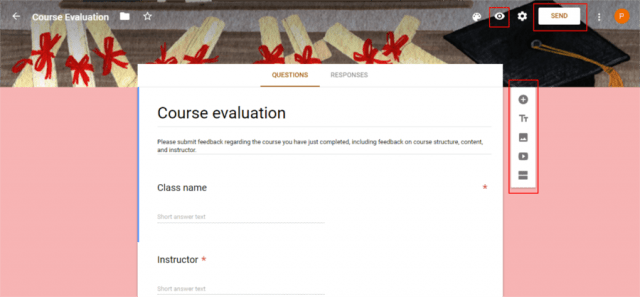
Questions can appear in different formats – multiple choice, drop-down lists or linear format. You can drag and drop questions to arrange them in any order. You can also choose a visual theme design.
See Also:White Hat SEO methods of website promotion
In addition, if you add your photo or logo, Google will automatically come up with a choice of colors or themes that set the tone for your form.
You can be able to skip questions, set up a confirmation page, use add-ins for an even more powerful form, and view your customized form in real time.
After you’ve set up everything, find the “eye “ icon at the top and click it to view the form. If you are satisfied with how the form looks, continue and click the ” Send” button.
On the next screen, the options are offered, as you can access the form.
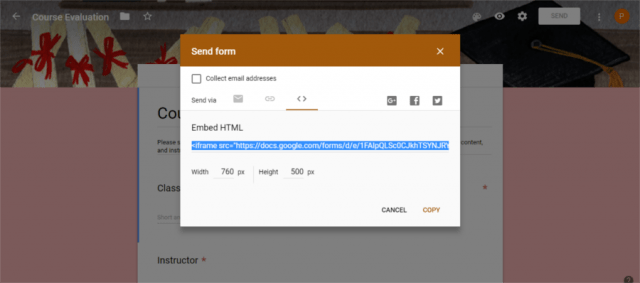
You can choose
- send the form to your e-mail,
- share a link with other users,
- copy the embed code and paste it into your WordPress.
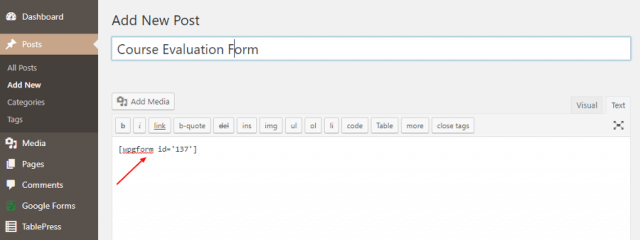
Since our task is to add Google forms to WordPress, copy the code
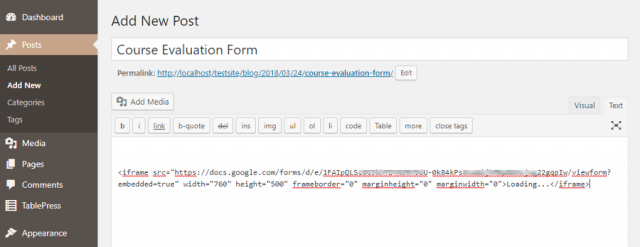
and paste it into the new record. Then go to the viewing and publishing of the entry. This displays the course evaluation form that we copied to the WordPress site.
Another manual way to configure Google Forms is to use your Google Drive. On your disk, find the new one in the upper left corner and click on it. Then find the ” More” option that will lead to Google forms. You can also select a new form.

Option 2: How to add Google forms to WordPress using the plugin
When you simply paste the code into your post or WordPress page, you get a form that preserves the default Google style. It does not apply your CSS and can not be combined with your site theme. Most likely you need a form that more closely matches the style and brand of your WordPress site. For this, the plugin Google Forms WordPress.

The Google Forms to WordPress plugin allows you to add and manage Google Forms WordPress using the admin panel of the site. In addition to the fact that the plugin offers several options for changes and style of your Google form, it integrates your forms with WordPress. It removes the HTML-cover of Google and embeds the form directly on the pages and in the records of your site.
See Also:SEO recommendations on how to promote the site in Google
The plugin is easy to use. As always, you first need to install and activate the plugin. After activation, you will find the form element Google, added to the WordPress menu on the toolbar.
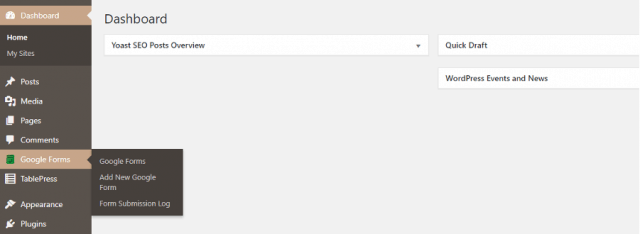
Click Add New Google Forms.

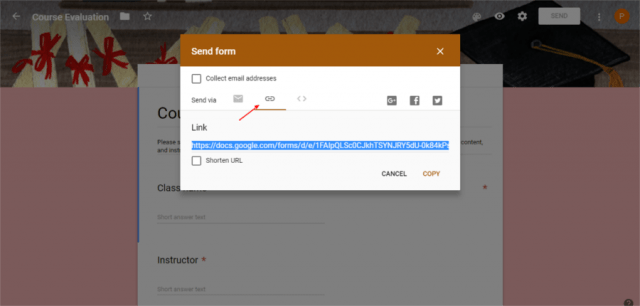
At this point, go back to the Google form and copy the URL in the “Send Options” section and paste it into the “URL Form” field.
Fill in the remaining options as you see fit, keeping the overall style of your website. You can also change the text that will appear on the confirmation page.
Publish the form and find its short code:
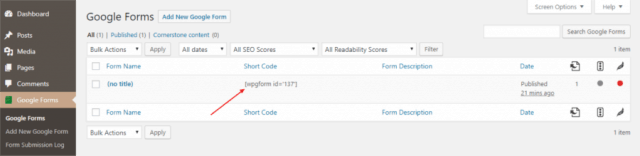
Copy the short code, open a new entry and paste it into the text editor.
The appearance of your form will now depend on the active theme on your website or any custom CSS that you add using the plugin configuration settings.
It’s important to note that the plug-in supports only published Google forms. In other words, you should be able to open the URL of the form from the browser. This means that these forms will not work for private use.
The form log
When collecting answers to polls for any of your purposes, you need to format them in a way that makes sense and provides understanding.
The plugin has a form submission log section where you can view all the answers. The timestamp and the URL of each view are saved, and they can provide valuable statistical information. If the records are no longer needed, you can delete them.
Alternatively, you can access your Google Drive and view all the answers directly on the disk. After opening the disc, find the form, open it and click the ” Answers” button in the top menu.
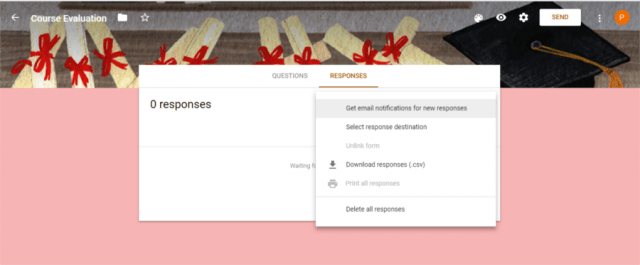
You will be able to view all the answers in a spreadsheet format. Click the + (hidden in the image above) button, select a destination for replies, or upload them in CSV format. You can also enable e-mail notification for replies or delete them via your disk.
See also:What is the difference between a web developer and a web designer?
Google Forms is a simple and popular way of collecting feedback or answers for any purpose. They are universal, and you can use them for interviewing, receiving applications, questionnaires, check-lists. It’s easy: create Google forms and share it with third parties, whether sharing a link, sending an e-mail or embedding it on your site.


